Figuring out the Fix Gadget in Photoshop: A Juvenile’s Helper
The Fix Gadget in Photoshop is a major area of strength for an easy-to-include gadget for fixing surrenders in your photos. Whether you’re overseeing flaws, stains, or unfortunate articles, the Fix Contraption grants you the ability to quickly fix and blend those areas to match the incorporating bits of the image. Could we hop into how it works and how you can use it to deal with your photos?
What is the Fix Gadget?
The Fix Instrument is a piece of Photoshop’s recovering gadgets, and it’s expected to help you take out or fix hurt districts of an image by displacing them with pixels from another piece of the image. Not in any way, shape, or form like the Repairing Brush Instrument or Spot Recovering Brush Gadget, which thus blend the good locale in with the enveloping pixels, the Fix Mechanical assembly grants you the ability to pick your ideal area to use to fix the problem area.
It’s ideally suited for fixing greater districts or overriding unequivocal bits of an image while keeping a predictable blend in with the establishment.
Bit by bit guidelines to use the Fix Gadget
This is the method for using the Fix Gadget step by step:
Open Your Image
Start by opening the image you really want to manage in Photoshop.
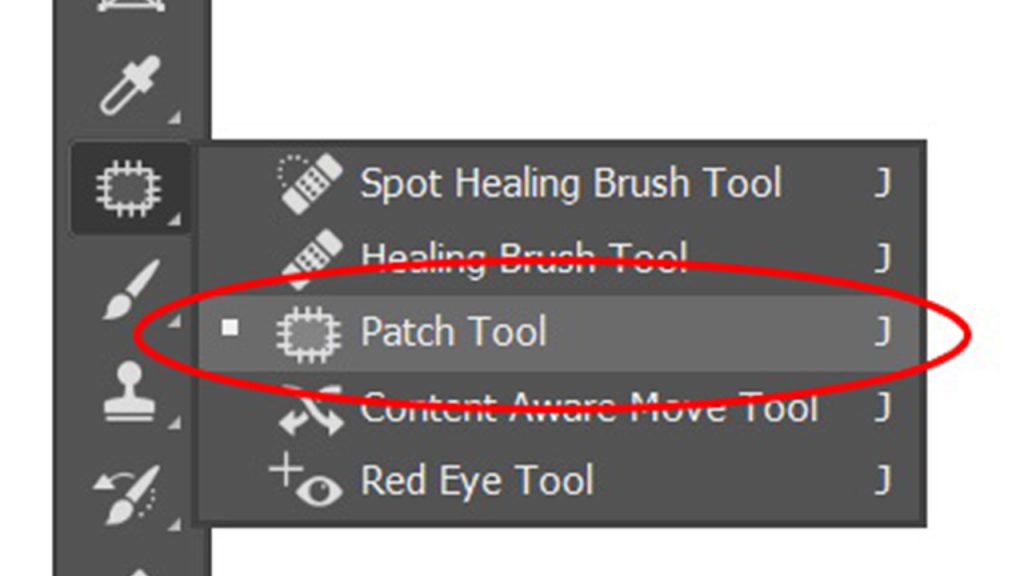
Select the Fix Instrument
The Fix Contraption is arranged in the toolbar, for the most part under the Spot Repairing Brush. Snap and hold the Spot Retouching Brush gadget to reveal the Fix Contraption.
Pick the Fix Mode
At the most elevated place of the screen in the decisions bar, you’ll see two modes for the Fix Gadget:
Source Mode: This mode licenses you to pick a district you want to fix and subsequently pick an ideal locale to override it with.
Objective Mode: In this mode, you select the district you really want to move, and Photoshop will blend it into the area you’re fixing.
For most fixes, you’ll use the Source Mode.
Select the Locale to Fix
Use the Fix Instrument to draw a decision around the area you want to fix. This could be an imperfection, stain, or another flaw.
Drag the Decision to an Immaculate Locale
After you pursue your decision, click inside the assurance and drag it to a locale of your ideal picture to use as the replacement. Photoshop will normally blend the new pixels into the area you’re fixing.
Refine the Upkeep
If fundamental, you can change the decision or repeat the association until you’re satisfied with the results. The Fix Gadget will work really well for blending the proper locale in with the enveloping pixels, but sometimes you could need to roll out little improvements.
Tips for Best Results with the Fix Gadget
Pick a Similar Locale for Fixing: While at the same time picking the district to use as a fix, endeavor to pick one that has relative lighting, surface, and assortment to the area you are fixing. This will help the upkeep with blending even more ordinarily.
Work in Little Portions: If you’re fixing a colossal locale, it’s by and large anticipated that better should work in additional unassuming regions rather than endeavoring to fix everything all the while. This thinks about more precise control.
Use the Recovering Brush Ensuing to Fixing: right after using the Fix Contraption, you can furthermore smooth out the edges or nuances with the Retouching Brush Gadget to make the support significantly more reliable.
Feather Your Assurance: Before pulling the decision, use the Tuft decision in the toolbar to smooth the edges of your assurance. This can help with making the fix blend even more effectively with the enveloping locales.
Use the Substance Careful Decision: The Fix Instrument similarly has a Substance Careful decision, which uses’ areas of strength for Photoshop to help thusly match surfaces and lighting, making the support fundamentally more steady.
When to Use the Fix Instrument
The Fix Gadget is great for various endeavors, including:
disposing of defects or skin breakouts from portrayals.
Fixing hurt locales in old photos, similar to scratches or stains.
Displacing unwanted things in an image (like a sign or a person in the background).
Revising skin to smooth out disproportionate tones or surfaces.
Model: Fixing a Blemish on Skin
Assume you’re managing a portrayal and have to dispose of a little defect with respect to the matter’s skin. This is the manner in which you can use the Fix Instrument:
Select the Fix Gadget and make an assurance around the blemish.
Drag the assurance to an area of skin that is perfect and freed from deserts.
Permit Photoshop to combine the pixels as one. If imperative, refine the assurance until the blemish is gone, and the skin looks smooth and ordinary.
The Fix Instrument is a crucial piece of Photoshop’s remedying gadgets. It’s quick, easy to use, and provides you control over how to fix areas in your photos. Whether you’re fixing blemishes, taking out interferences, or making immense fixes, the Fix Mechanical assembly helps you with making reliable, cleaned results.