The Burn Tool in Photoshop: A Straightforward Aide
Photoshop is an incredible asset for altering and making astounding pictures, and one of its unexpected, yet invaluable treasures is the Burn Tool. To make portions of your picture hazier or add profundity, the Burn Instrument is your go-to choice. How about we plunge into what it does and how to successfully utilize it.
What Is the Burn Tool?
The Burn Tool resembles a computerized paintbrush that obscures region of your picture. Consider it in the event that you’re consuming a photograph in a darkroom to cause portions of it to seem more obscure. In Photoshop, this tool gives you exact command over where and the amount to obscure.
Where to Find the Burn Instrument
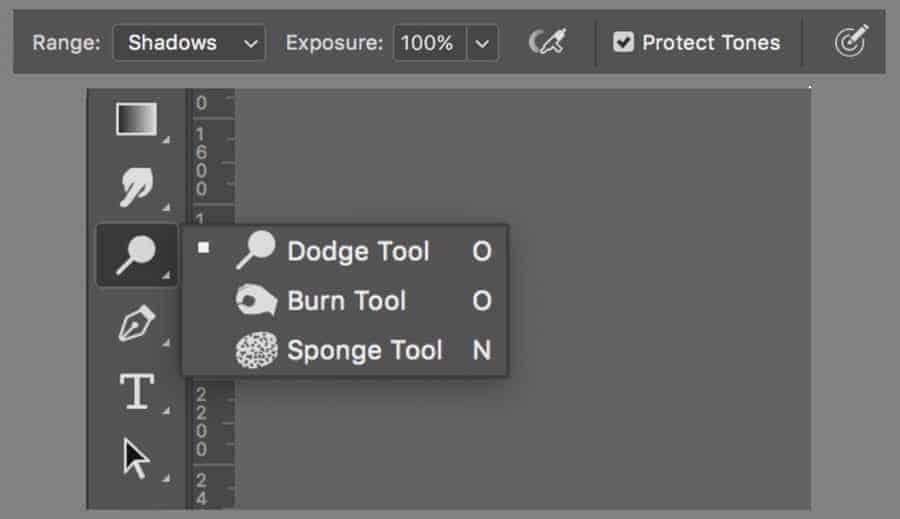
You can find the Burn Tool in the Apparatuses Board on the left half of your Photoshop screen. It seems to be a hand making an “O” shape. In the event that you don’t see it, it very well may be concealing under the Avoid Apparatus or Wipe Tool. Right-click (or long-push) on those apparatuses to uncover the Burn Tool.
The most effective method to Utilize the Burn Apparatus
Utilizing the Burn Apparatus is simple! Follow these means:
Select the Burn Tool: Snap on it in the Apparatuses Board.
Pick Your Brush Settings: At the highest point of the screen, you’ll see choices to change the size and delicateness of the brush. Pick a size that works for the area you need to obscure.
Set the Reach: In the Choices Bar, you’ll see three territory choices: Shadows, Midtones, and Features. These let you pick what parts of the picture (dim, medium, or light regions) to obscure.
Change the Openness: Openness controls major areas of strength for how obscuring impact is. Begin with a low worth, similar to 10-20%, for more control.
Paint on the Picture: Snap and drag over the areas you need to obscure. The more you paint, the hazier it gets.
Tips for Improved Results
Use Layers: Work on a copy layer so you can without much of a stretch fix changes if necessary.
Go Gradually: Develop the obscuring impact steadily as opposed to rolling out enormous improvements immediately.
Join with Different Instruments: Utilize the Burn Apparatus with the Avoid Tool (which eases up regions) to add difference and show to your pictures.
When to Utilize the Burn Apparatus
The Burn Instrument is ideally suited for:
Adding shadows to make objects look more 3D.
Improving subtleties by obscuring explicit regions.
Fixing overexposed pieces of a photograph.
Last Considerations
The Burn Apparatus might appear to be straightforward, yet it’s unquestionably strong for making shocking impacts and adding profundity to your pictures. Work on utilizing it on various sorts of photographs, and you’ll see exactly the amount it can lift your work. So whenever you’re altering, remember to check the Wear Tool out!