The most effective method to Utilize the Background Eraser Tool in Photoshop
The Background Eraser Tool in Photoshop is a straightforward yet strong element that assists you with eliminating undesirable backgrounds from a picture. This tool is particularly helpful when you need to separate a subject from its environmental elements. Here, we’ll clarify how for utilize the Background Eraser Tool bit by bit in straightforward terms.
What is the Background Eraser Tool?
The Background Eraser Tool is an exceptional brush that eliminates portions of a picture in view of variety. At the point when you utilize this apparatus, Photoshop tests the variety where you click and erases all comparable tones around it. This makes it ideal for eliminating backgrounds with strong tones or slight slopes.
Moves toward Utilize the Background Eraser Apparatus
Open Your Picture in Photoshop
Begin by opening the picture you need to alter in Photoshop. Ensure the layer isn’t secured by double tapping on it in the Layers board and clicking “Alright” to open it.
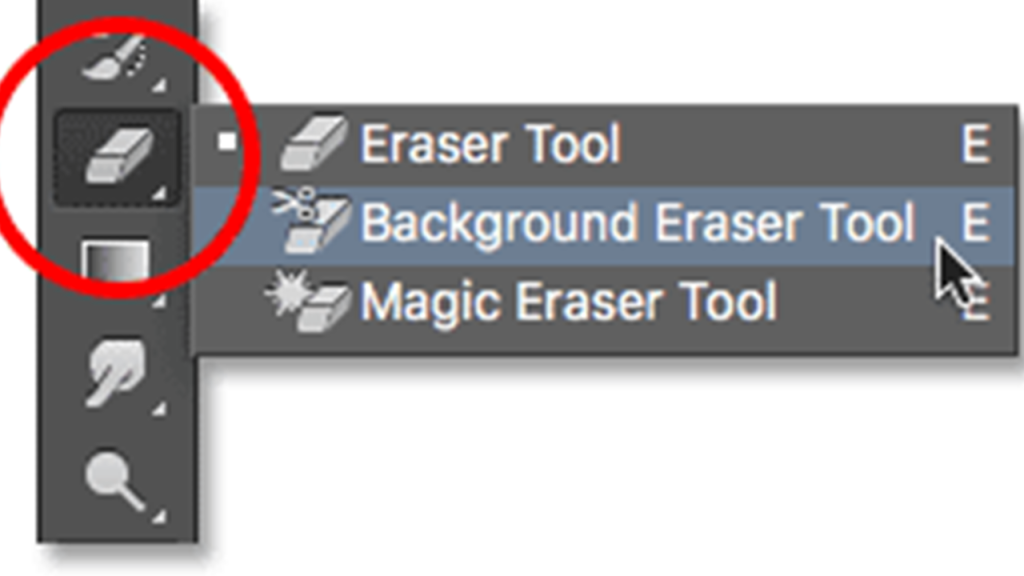
Select the Background Eraser Tool
Go to the toolbar on the left half of the screen. Snap and hold the Eraser Instrument, then pick “Background Eraser Apparatus” starting from the drop menu.
Change the Brush Settings
At the highest point of the screen, you’ll see choices for brush size and hardness.
Utilize a delicate brush for smoother edges or a harder brush for exact cutting.
Change the size to accommodate your subject for better control.
Set the Inspecting Choice
At the highest point of your work area, you’ll see three inspecting choices:
Nonstop: The apparatus constantly tests tones as you move.
Once: The tool deletes just the main variety you click on.
Background Pattern: Eradicates regions that match the background variety sample.
For most undertakings, the “Consistent” mode works best.
Pick Cutoff points and Resilience
Limits: Pick between “Bordering” (eradicates associated pixels of a similar variety) and “Discontiguous” (deletes every single comparative tone, regardless of whether they’re not contacting).
Resilience: This decides how comparable the varieties should be for the tool to delete them. Lower resistance is more particular, while higher resilience eradicates a more extensive scope of varieties. Begin with a resilience of 30-half and change depending on the situation.
Eradicate the Background
Snap and drag the tool over the background. You’ll see the undesirable pieces of the picture vanish. Be cautious while working close to the edges of your subject. Zoom in to guarantee accuracy.
Calibrate the Edges
Subsequent to deleting the background, you could see a few extra edges or regions that need finishing up. Utilize the customary Eraser Tool or the Tether Apparatus to tidy these up.
Save Your Work
When you’re content with the outcome, save the document. To keep the straightforward background, save it as a PNG record.
Ways to utilize the Background Eraser Instrument
Utilize a bigger brush for enormous regions and a more modest brush for definite segments.
Watch out for the crosshair in the focal point of the brush. It figures out which variety Photoshop is eradicating.
For complex backgrounds, consider joining the Background Eraser Tool with other determination instruments like the Fast Choice Apparatus or the Pen Apparatus.