Understanding the Dogde Tool in Photoshop
The Dogde Tool in Photoshop is a convenient tool that allows you to light up specific region of a picture. It’s ideally suited for featuring explicit pieces of your photograph or work of art, assisting them with standing apart more. To figure out how to make your pictures pop, the Dogde Tool is an incredible spot to begin.
What Does the Avoid Tool Do?
The Avoid Tool works by easing up the pixels in the space you paint over. This is perfect for lighting up shadows or underlining subtleties in your picture. Something contrary to the Dogde Instrument is the Consume Tool, which obscures regions all things considered.
Instructions to Utilize the Avoid Tool
Here is a bit by bit manual for utilizing the Dogde Instrument:
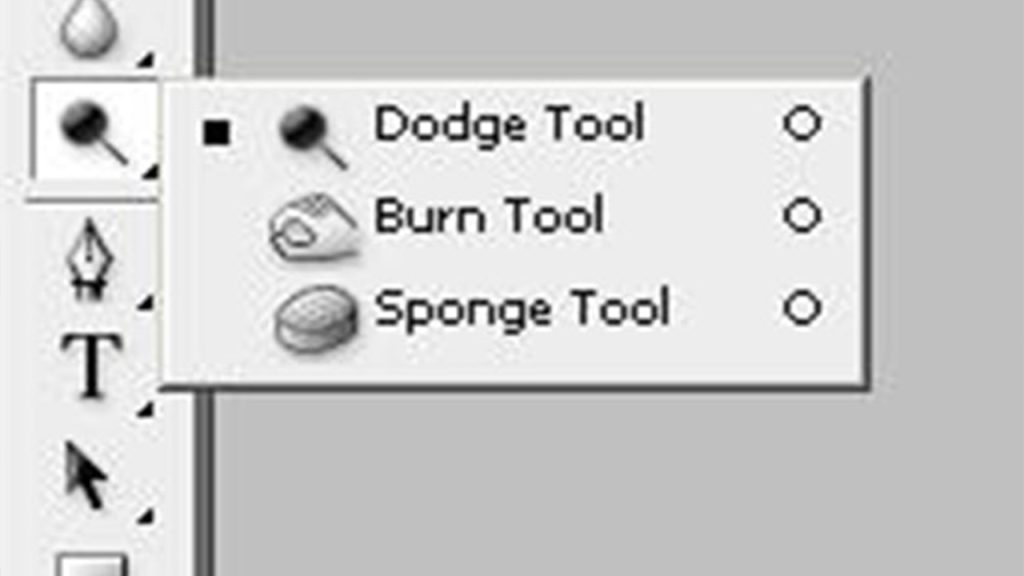
Select the Dogde Tool: First, open your picture in Photoshop. To choose the Dogde Tool, click on the symbol that seems to be an amplifying glass or a candy in the toolbar on the left half of your screen. On the off chance that you can’t find it, right-click on the Consume Instrument (which is beneath the Dogde Tool) and select Avoid Tool from the menu that shows up.
Pick the Reach: In the top menu bar, you’ll see a choice called Reach. This allows you to pick what part of the picture you need to ease up. There are three choices:
Midtones: Lights up the center tones of your picture (generally normal).
Shadows: Eases up the hazier region of your photograph.
Features: Lights up the lighter region of your picture.
For most altering, Midtones is a decent decision.
Change the Openness: Right close to the Reach choice, you’ll see Openness. This controls how much the Avoid Tool will ease up the picture. A higher openness implies a more grounded impact, while a lower openness makes the impact more unpretentious. Take a stab at beginning with around 10-15% openness and change from that point.
Paint Over Regions to Ease up: Snap and drag your brush over the region of the picture you need to ease up. You can change the size of the brush by squeezing the left or right section keys on your console ([ or ]). You can likewise change the hardness of the brush (whether it has delicate or sharp edges) to suit your necessities.
Calibrate Your Work: In the wake of utilizing the Avoid Tool, you should zoom in and really look at your work. Assuming you’ve lit up a lot in certain areas, you can change the openness or fix your last step (Ctrl + Z or Cmd + Z). To continue easing up, continue onward until you’re content with the outcome.
Ways to utilize the Dogde Tool
Utilize a Delicate Brush: A delicate brush will give you a smoother impact, assisting with keeping away from brutal lines. This is particularly valuable while working with complexions or unpretentious changes in lighting.
Work in Little Segments: It’s smarter to cover up little regions all at once as opposed to attempting to light up enormous areas at the same time. Along these lines, you’ll have more command over the outcome.
Non-Damaging Altering: to keep your alters adaptable, make another layer and work on that layer utilizing a delicate white brush with low obscurity. You can change or eliminate your alters later if necessary.
When to Utilize the Dogde Tool
The Avoid Tool is useful for the majority various kinds of altering, including:
Picture Correcting: Ease up the eyes or face to make more spotlight regarding the matter.
Item Photography: Feature specific subtleties or highlights to make an item stick out.
Workmanship and Delineations: Add light to explicit areas of advanced drawings or outlines for profundity and accentuation.
Conclusion
The Avoid Tool is a fundamental piece of your Photoshop tool stash for lighting up pictures and making accentuation. It’s not difficult to utilize, and with just the right amount of training, you can rapidly dominate it to upgrade your photographs or plans. Simply make sure to change your openness and utilize delicate, controlled strokes to come by the best outcomes.